Payment Steps in Checkout Flow
In this guide, you'll learn about Medusa's accept payment flow that's used in checkout.
Overview of the Payment Flow in Checkout#
The Medusa application has a built-in payment flow that allows you to accept payments from customers, typically during checkout.
This flow is designed to be flexible and extensible, allowing you to integrate with various payment providers.
The payment flow consists of the following steps:
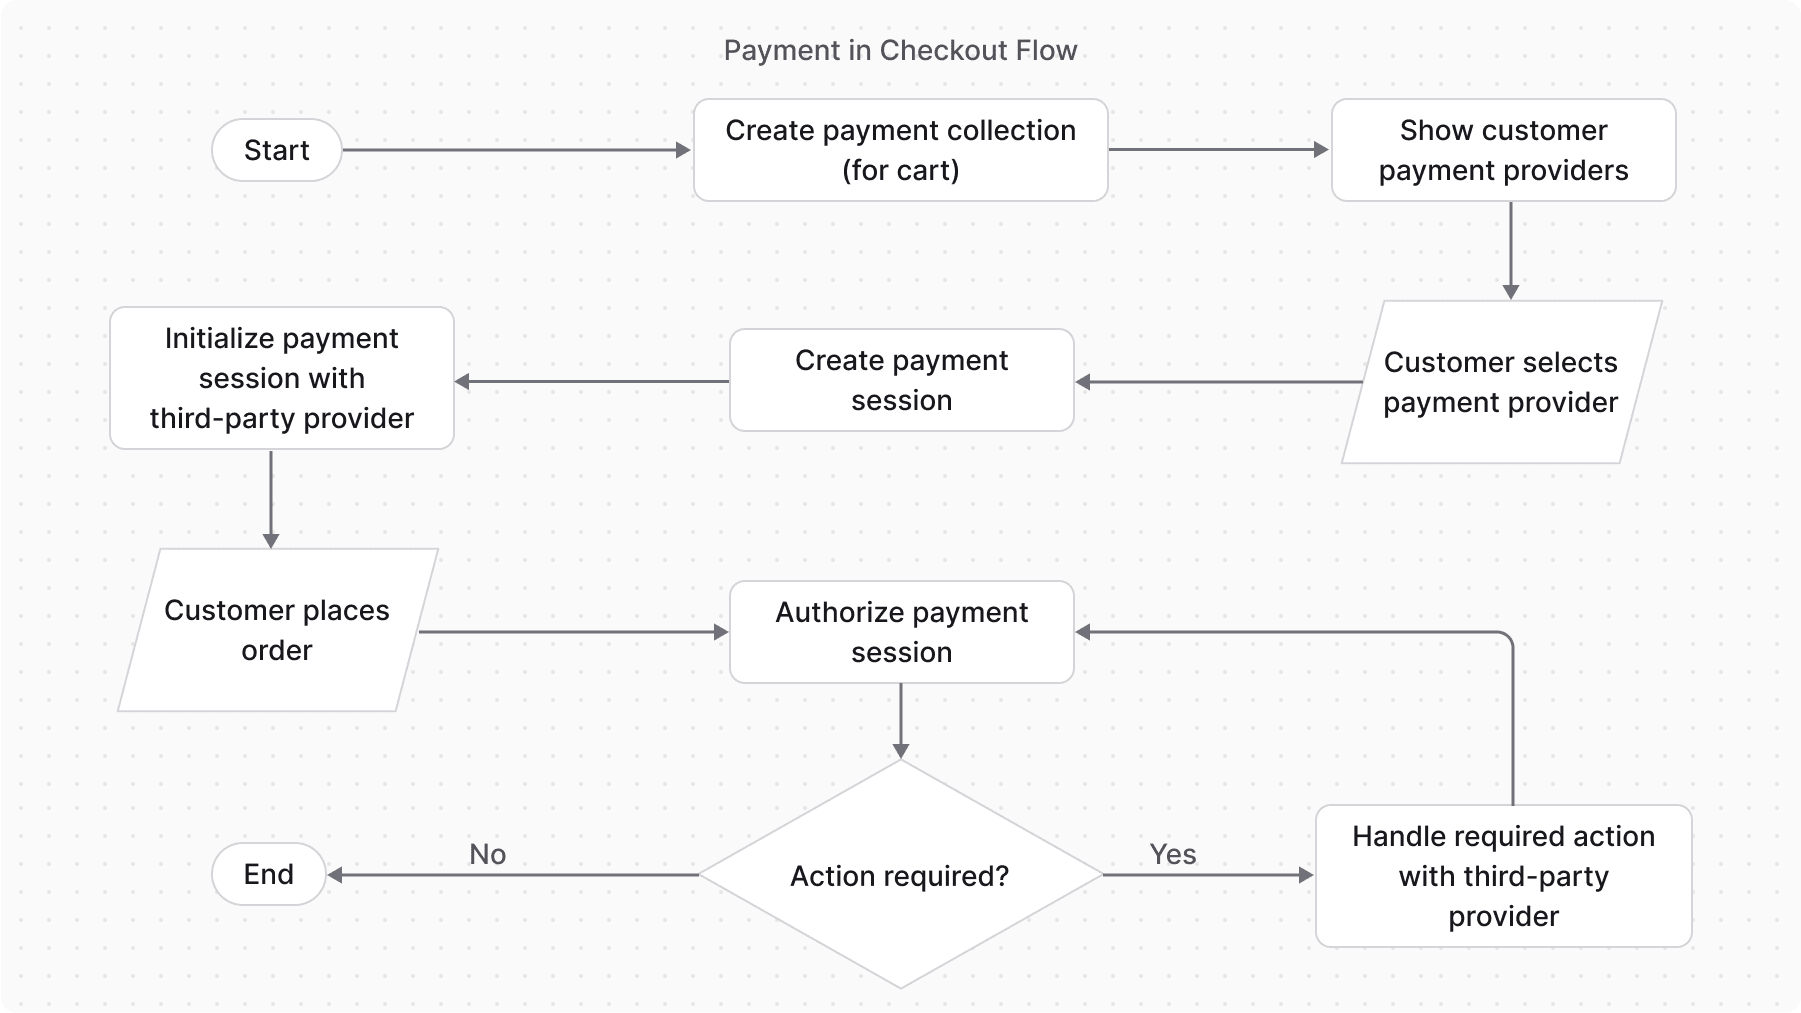
- Create Payment Collection: Create a payment collection associated with a cart.
- This payment collection will hold all details related to the payment operations.
- Show Payment Providers: Show the customer the available payment providers to choose from.
- You can integrate any payment provider, and you can enable them per region.
- Create and Initialize Payment Session: Create a payment session for the selected payment provider in the Medusa application, and initialize the session in the third-party payment provider.
- Complete Cart: Once the customer places the order, complete the cart, which involves:
- Authorizing the payment session with the third-party payment provider.
- If the third-party payment provider requires performing additional actions, show them to the customer, then retry cart completion.
Implement Payment Checkout Step in Storefront#
If you're using the Next.js Starter Storefront, the checkout flow is already implemented with the payment step.
If you're building a custom storefront, or you want to customize the checkout flow, you can follow the Checkout in Storefront guide to learn how to build the checkout flow in the storefront, including the payment step.
Build a Custom Payment Flow#
You can also build a custom payment flow using workflows or the Payment Module's main service.
Refer to the Accept Payment Flow guide to learn more.